Tech & Toys
-
Aerokit Sea Nymph build - part 3
I have managed to visit the local model shop where I bought a nice propshaft, prop, motor mount, UJ and a little ESC. The ESC is NiMH only, partly because I wanted to make use of some old NiMH cells, rather than my aircraft LiPos and partly because the model shop had nothing else in and I didnt fancy going elsewhere. So at some point in the future I’ll have to face up to getting a buggy pack in there. One thought I had was to split it into mini packs, but still wired the same way. Not thought much about that yet but it is a possibility.
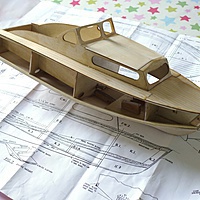
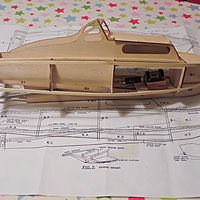
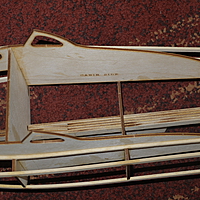
As for tonights progress, I’ve all but completed the upper cabin area and the hatch. Everything needs shaping but it is all together. The one pain is there gap between the two upper windows, they were too short and I had no ply in, so I’ve left a gap and cut a wedge shape out of offcuts to fit in the gap, I’ll get that in tomorrow.
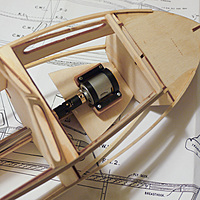
The biggest progress is the motor is now mounted. I had to lower the mount plate, cut some wedge shaped bearers and still had to shave a bit out of the plate because the motor was still sitting too low. It all feels solid though and the motor is a straight run to the prop shaft so I’m happy. The propshaft is still too long, I’ll get to that tomorrow.
So now I can’t avoid attending to the rudder. Gulp!
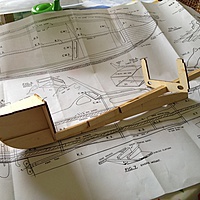
Last shot for tonight.
You can read through all the posts about the Sea Nymph build here.
-
Aerokit Sea Nymph build - part 2
Progress started off pretty quick, the laser cutting is very nice and before long you end up with the basic structure assembled.
I’ve only taken the odd picture while going along, but you’ll get the idea.
First up is the keel, you can see the front and rear formers have been attached in this shot, as has the breasthook.
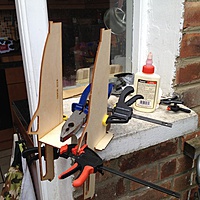
Now this may look like some crazy goings on but trust me, it is all square. I’ve no real building area at home so I have to improvise. The window sill is at a slant, but the two cabin sides are perpendicular to the former and it is all clamped up so it stayed that way!
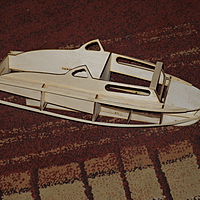
This is where I’m at right now, main structure built. I’m currently fiddling with the angled windows above the cabin roof which I’ve not yet satisfied myself I understand, more head scratching!
The rear cabin area is something which is troubling me at the moment. The floor originally was quite low, but I think I need to raise it sufficiently to hide my NiMH under it, I’m just worried that might be too high to look good. I’m also wondering where to put the rudder servo. I dont much want to raise the floor enough to have it under it, so I think maybe build a box at the back and decorate it as a seat.
You can read through all the posts about the Sea Nymph build here.
-
Aerokit Sea Nymph build - part 1
Before I start let me say I’m a complete beginner with model boats, I have been building and flying planes and helis for a while. So what got me into this boat lark?
I have a toddler (~3years old) who we quite often take to the children’s play area in a local park; Broomfield Park here in London. On the way to the kids area there is a fairly well attended model boat club using what I believe to be a purpose built boating lake which dates from many years ago. He loves watching the little boats on the pond, seemingly more interested in them than my noisy planes! One day my wife suggested I build him a little boat, well how could I refuse!
I’m a great fan of vintage model aircraft, and while flipping through a ’70s vintage Keil Kraft catalogue I found a selection of boats from the Aerokit range, a bit of googling later lead me to the Vintage Model Boat Company, (who are no more, having been bought by SLEC). They produce laser cut kits of some of this range. Not being one to think things through completely before diving in! I soon found myself in possession of a Sea Nymph kit 🙂
So this is how I got here, the rough plan is to try and use a 7.2v buggy NiMH pack and a receiver out of a car I no longer use. The kit came with a 385 (I think?) motor and I have a spare 9g mini servo. So I’ll need a rudder, prop shaft, prop and ESC.
Being mostly a thing for my kid to play with I dont intend to go to town on detailing. Simple but nicely done is sort of what I’m aiming for!
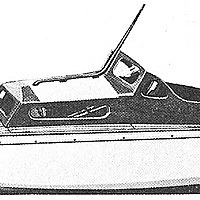
This is a scan of the KK catalogue.
You can read through all the posts about the Sea Nymph build here.
-
Diamond Demon build - part 4
Little spot of progress tonight, I got the cabin structure built.
And, although not pictured, I’ve built the upper rear fuselage formers in preperation for the upper longeron. I’m not sure how strong it will be, lots of but joints which I’m not too keen on. I’ll give it a go as per plan and then if it all feels a bit weak I’ll try and beaf it up a bit.
-
Diamond Demon build - part 3
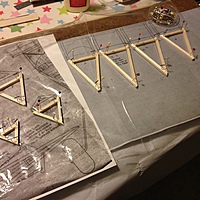
Ok, so my life seems to be mostly consisting of triangles at the moment!
I managed to get the lower formers attached to the main crutch and have added the lower curved 3/16" sq.
The tail skid at the back is cut off the laminated fin outline which is the first bit I made.
The last step for tonight was to assemble two cabin structures, one built on top of the other over the plan in the traditional manner. These will then be glued in place ontop of the fuselage crutch, then I can move onto the upper formers. Guess what shape they are? Yep, you guessed it, more triangles! Joking asside they are what gives this model the distinctive cross section I love so much.
-
Diamond Demon build - part 2
I’ve glued up all 7 of the triangular formers for the lower fuselage. Next step is to tidy them up a bit: level off the tops and get the bottoms nicely flat to receive the 3/16" square lower longeron.
-
Friends again
[]({{ “/uploads/2012/08/20120811-102651.jpg” | prepend: site.baseurl }})
So this week was slightly maddening. After putting four tanks through the 81 on the bench, and then a further two in the airframe I wasn’t expecting any problems when I got over to the flats. Hmm, how wrong can you be? Wednesday was a beautiful day, I managed to get over to our flying field at about half seven. Assembled the Acro, filed the tank, started the motor, then it died on me. Cut a long story short I spent 30 plus minutes fiddling with it before I got it running sort of ok. It sounded a bit lumpy but I figured it would be ok, so I taxied out of the pits and took off. A couple of short circuits later and she conked out at maybe 50 foot. Eeek! Gliding her home wasn’t the end to the first flight I was hoping!
I got her down in the middle of the patch and without any damage, which I have to admit I was quite proud of! Trying to restart it, the motor started to make very unhappy noises so I gave up for the day. Out came the Wot 4, which never misses a beat!
Next day I pulled the motor out of the airframe, put a new plug in and checked under the rocker cover and in the cam housing. I couldn’t see anything amiss and she felt right when turned over. Back on the bench, a couple of tanks went through it without any hint of a problem, so back in the airframe it went. Now awaiting the next trip to the flats.
-
Blade 450 3D maiden
[]({{ “/uploads/2012/08/20120820-225249.jpg” | prepend: site.baseurl }})
About 10 months ago after many many flights on my 120 SR and feeling the need to move to a cyclic heli, I bought a Blade 450 3D . Being a newbie I didn’t know about levelling the smash plate, so the first time I spun it up she tipped over and scuffed the blades quite badly. The head speed was so much higher than the 120 it all scared me enough to leave it in its box for nearly a year.
So who knows why, but tonight I figured I ought to try it again. I forgot the training gear so just had to go for it. Well I’m pleased to report my first three flights on a cyclic heli went without any unplanned arrivals. It nearly got away from me while being overly confident ad trying a circuit but I caught in time. More hovering practice before circuits I think!
-
Diamond Demon build - part 1
First step was to laminate the fin outline:
I’ve never attempted laminating or bending wood before, so I’m pretty pleased with the outcome.
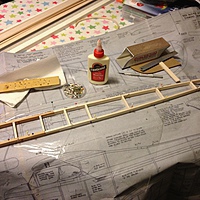
Next up was the central crutch of the fuselage
Going to need a bigger building board then! I think doing it in stages will suffice for the Demon, but the Matador will certainly need something bigger!
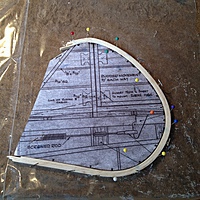
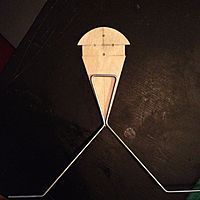
The last bit I’ve done is the main former which holds the UC and originally the bearers for the motor. I’m going to mount my outrunner on some threaded rods bolted directly to this. Bending up the UC was a cause for some trepidation, but with a vice and a decent wire bender I got there. Its not perfect but the Axles line up so I’m happy with the result.
The next step is to build a load of triangular formers for the lower fuselage, that’ll have to wait until tomorrow.
-
Keil Kraft Phantom maiden
Finally maidened the KK Phantom tonight. Had about 5 flights in total, of which I flew 2. Sadly towards the end of the second flight I got a bit dizzy and, well, it didnt end well 🙂
I’ve updated the page for it with details of the damage. I’ll try and repair it!
