Tech & Toys
-
New Engine - OS 10FP
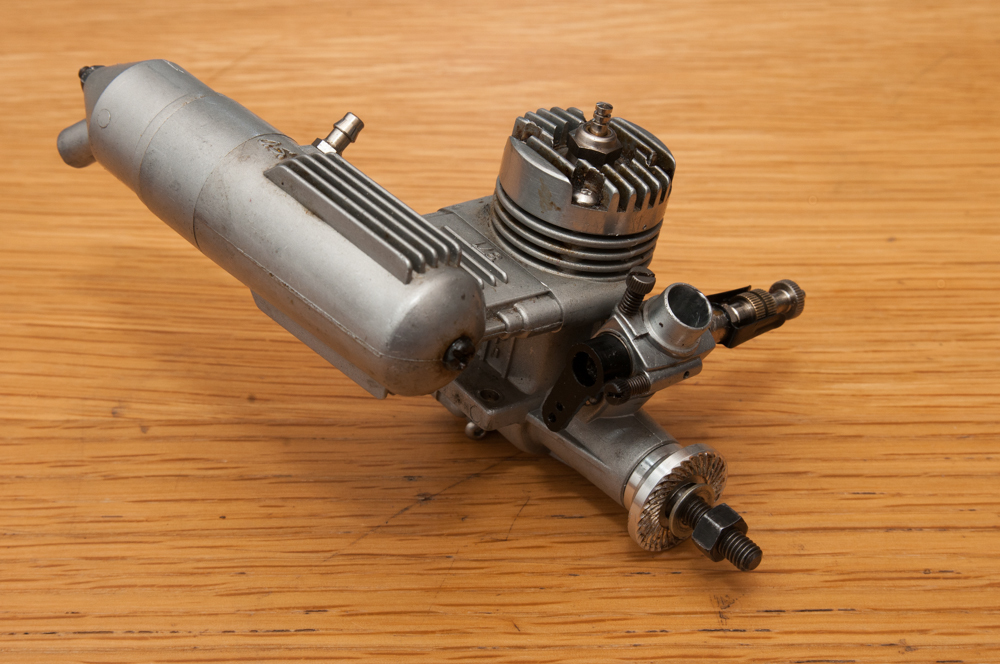
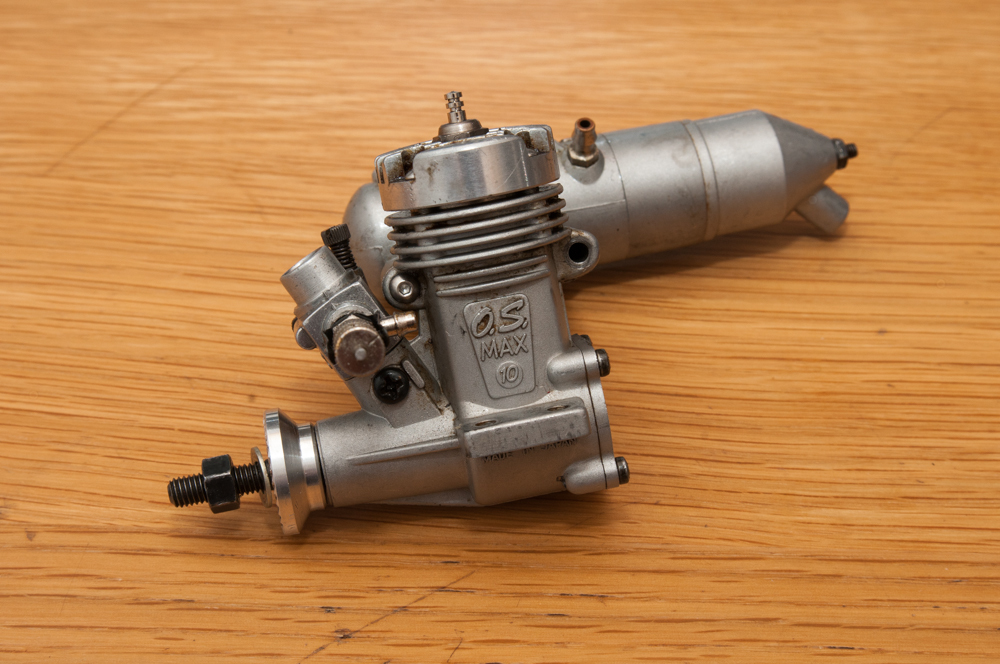
Last week I succumbed to a spot of eBay therapy and accidentally bought a little OS 10FP 2 stroke. It was listed as good condition, but apparently the owner had never made it run properly. I’ve always quite liked the idea of a small glow engine and figured maybe trying to get it to run OK would be a bit of a challenge, so I placed a bid and won the auction. I think I got it for a good price considering it was essentially a non runner so if I could make it work I’d have a bargain.
When the thing arrived I was impressed by how clean the casing was and found it turned over ok, with good compression. The carb. seemed to move fine and there were no visible blockages, so I wondered what could have caused the problems the previous owner had experienced. While inspecting it I discovered both the silencer and the cylinder head screws were absolutely buggered, somebody had clearly been at them with a screwdriver and now a Philips head driver was just happily spinning in the heads. Right then, clearly some filling action was going to be needed to get them out and new ones would need sourcing. After a bit of a struggle I got all of them out, measured them and ordered new ones (M2.5 x 10mm for the head and M2.5 x 25mm for the silencer).
While inspecting it with the silencer off I noticed the transfer port in the piston was facing the exhaust port, not the matching ports in the other side of the cylinder casting! Somebody had taken it apart and put the liner back in the wrong way round which would have caused the fuel to be pushed up into the upper cylinder right next to the open exhaust port, almost certainly causing it to either run very badly, or not run at all! If I had to guess at the problem, this would be it.
New screws have now arrived, I’ve put it back together and yesterday afternoon I mounted it on my test stand and gave it a flick, I’m pleased to say the little 2 stroke now runs really nicely, throttle response is smooth, WOT sounds fine and it happily idles at a very low RPM.
Quite pleased then! Just need to find something to build to put it in.
-
Paragliding in Wiltshire
I’ve had a bit of a rubbish weekend from a model flying point of view, it seems every time I go to fly events are conspiring to stop me. Firstly on Friday I managed to get some time in the afternoon to pop up to Bratton Camp, I was delayed by discovering a car fire on the way, then reporting it to the fire brigade and having to wait around until they turned up so I could give them a statement. Then I had to return home because I’d forgotten to take the pram out of the car, gah! When I finally got up to the hill I discovered 8 (!) paragliders in the air at once. When there are 1 or 2 of them up there, I’m happy to fly alongside them and aim for the gaps, but with so many up there at once I didn’t want to take the chance.
On Saturday morning I popped up the hill again nice and early, only to be greeted by what I think is the thickest fog I’ve ever seen. I couldn’t see the other side of the road from the car park! Oh well, maybe Sunday will be better.
The video below is of the Paraglider’s who were monopolising the hill on Friday afternoon.
-
Diamond Demon build - part 8
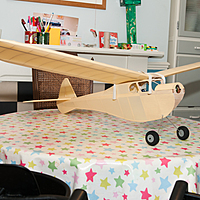
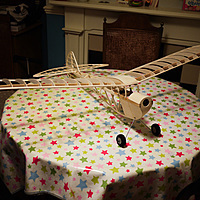
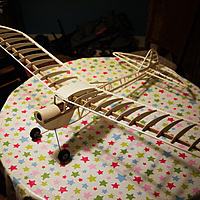
Spot of progress this week, I’ve all but finished the covering. Just the front most curved section below the motor and the centre section of the wings to go. I’ve some acetate on order to glaze the windows and then she is done. The tailplane and fin are now glued on, the elevator is all hooked up and the closed loop wires are run through the fuselage ready for me to connect the rudder. After that I’ll need to install the ESC and solder the connectors to the motor and she is finished.I am still pondering about coloured trim, I think I’ll finish her first then have a go at adding some colour.
-
Thomas and Friends Trackmaster layout
The lad seemingly has always loved trains, I’m not sure when this obsession started, but it was long enough now that it feels like it has been forever. One of his favourite train sets (yes, he has 3 different sets, sigh), is the Tomy (now Fisher Price) Trackmaster sets. These are battery powered trains of a nice size for a toddler to hold with plastic track which is pretty hardy which is handy given how kids toys get quite a rough life.
Pretty much every day, we would get some of the track out, make him a little railway and he would play with it. The problems started when his baby sister started to crawl. Then she seemed to take great joy in crawling over to the track and yanking on a piece of it, the track all being connected together means the entire track was dragged towards her and we had a very unhappy little man on our hands!
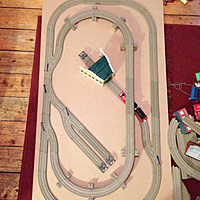
The solution was decided to be a chunk of some sort of board and fix a layout to that. ‘It has to have hills’ my wife added, ‘oh and a pond’ wtf! This is turning out to be a project, not just nailing some track to a board.
Ok, first step was to decide if we had a big chunk of board, where would we put it when not in use, our little Edwardian terrace is already bursting at the seams. There turned out to be a reasonable gap under the sofa, so a bit of measuring later and I had a chunk of 12mm MDF en-route which was cut to be the biggest it could be and still fit under the sofa, between the legs. I ordered a packet of little easy slide furniture feet to bang into the bottom to make moving it in and out easier.
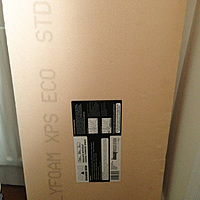
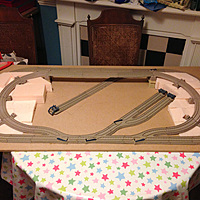
When the board arrived we started playing around with different layouts, trying to make it interesting given the space available. Once that was done I spent a bit of time researching how to make hills for a model railway. The consensus on various forums and Youtube seemed to suggest foam insulation board was a easy material to work with, so off to Wickes to buy a suitable bit of foam I went. The next step was pretty simple, I just hacked off cunks of the foam board and roughly shaped them to look like hills building up to the bridge bit of the track.
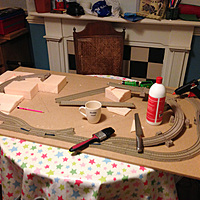
The pic above shows the majority of the foam in place, just need to work out the bit across the middle where the bridge section is and then crack on and carve it to shape to look like a hill. All the foam is being held in place with hot glue from a handy gun I had kicking around.
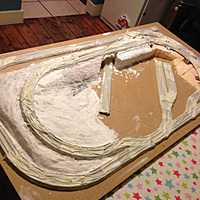
After the carving was finished I took the opportunity to glue everything down with more hot glue. The track and foam are all now safe from the little hands of the sister! Next I ripped up a newspaper and mixed up a bucket of plaster of paris. The strips were dipped into the plaster and then applied to the foam, trying to give it a nice contour and look like a hill as I went.
After all this had dried for a couple of days, I gave everything a couple of coats of mat white emulsion. I have to admit at this point I was tempted to call it a snow scene and declare it finished.
I found a model railway shop over in Leyton where I picked up some bags of green ground cover and some gravel, the friendly chap there giving me guidance as to how to apply it and to make sure it stays in position. Before starting with the grass, I painted the hills in mat brown emulsion and the flat area around the sidings in grey. Once that had dried, watered down PVA (about 50/50) was brushed on and then the ground cover sprinkled over the top. The same was done for the gravel effect areas. After all that had dried I sprayed a couple of thick layers of lacquer over the whole thing. Job done, toddler seems to like it, sis can’t pull it apart anymore and its easy to pack away at the end of the day. All round win then! And I can get back to the Diamon Demon which is still languishing unfinished.
Gallery of build photos
-
Diamond Demon build - part 7
Tonight I tackled the wings, covered with antique coloured Litespan. The tips were a bit of a challenge and I might yet cut them back and do them in smaller pieces. Other than that I’m pretty happy with how they turned out. Colour trim to go on later I think when the whole airframe is covered, the truth is I’ve not chosen a scheme yet!
-
Diamond Demon build - part 6
I’ve just noticed that in part 5 of this build I was wondering where 6 weeks went, well now four whole months have passed since I made an update about the poor Demon. Between a first birthday of our daughter, Christmas and putting our how up for sale, time has gone by in a flash.
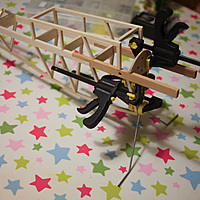
Progress has been made however and things are looking good. The fuselage is done and the servos installed, I’ve yet to put balsa infill where the closed loop and pushrods will exit, but the rest is finished and sanded. The tailplane and fin are done and sanded, awaiting covering. And lastly as you can see, she now has wings. Built as per plan with the exception of the 1/64" ply covering the centre section. I added this to give some protection from the bands which will be used to hold the wings on.
I’m almost ready to start covering her up, just a wee bit of faffing about first. Couple of pics below, the rest are on this page.
-
Phoenix 2000 - update
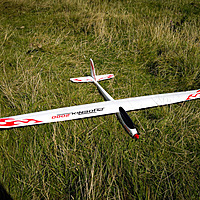
I have managed a few updates since September when I added the page for the Phoenix. First off was fitting the flap servos in the wings, next I added a 5A sBEC because the BEC in the supplied ESC is said to not be up to the challenge of powering 6 servos. All was then well and I had a couple of flights over the weekend. The flaps seemed to work ok, more fiddling with regard to the amount of deflection is needed, and I’d like to try crow braking and full strip ailerons. Another day though!
Two things did occur to me though, firstly that plugging 4 servos into the receiver while rigging for each flight was somewhat tedious. And secondly on the last flight of that weekend (Sometime in November) an alarming amount of dihedral had developed in the wing, clearly something was amiss! I got her down again thankfully and started to investigate the cause of the flappy wings. At the time I discovered one of the ply plates in the wings had de-laminated completely, I could pull each of the layers of wood away from the next, this is not good! When I got back to London I cut two new 3/32" ply plates for the wings and a new ply joiner.
Over Christmas we were down in Wiltshire again so I got to glue in my new wing joiner plates. While waiting for the glue to dry I assembled the Weasel which I also store down there. And lo and behold, at the bottom of the bag was the carbon wing joining spar which I’d forgotten to install in the Phoenix! I’d even forgotten such a thing existed, what an utter fool. Oh well, no harm done. I was lucky to get her back in one bit and at least there are decent ply plates in the wings.
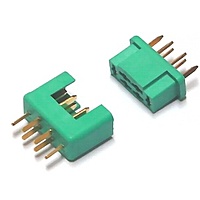
Next up was how to solve the problem of all those wires. I Googled a bit around the subject and found a lot of people using Multiplex connectors. These are 6 pin items, normally used as a battery connector, however because of the number of pins they make handy things for joining servo wires.
I’ve soldered both the servowires in one wing to a single male connector, and the same on the other wing panel, but using a female connector. Then all I had to do was take four servo extension leads, remove the sockets and solder them to a socket and a plug. Having one wing as female and one as male ensures I don’t get them mixed up when plugging everything in. 24 soldered connections, all wrapped in heatshrink tubing took a while but I think it was worth it. They make for very positive connections and feel a lot more robust than repeatedly plugging wires into a receiver.
Thats all for now, I’m not sure when our next trip down to the West country will be, but I’m looking forward to it.
-
Blade 130X
[]({{ “/uploads/2012/12/BLH3780_a2.jpg” | prepend: site.baseurl }})So a trip to 308 Hobbies to buy a couple of snakes (Broken link
http://www.sullivanproducts.com/GoldnRodMainFrame.htm) lead me to discover they had the 130X on sale at an unbelievable price. Ooops. So in short, I came home with two snakes for the Tuc, oh and a new heli. Ahem.
-
Broken Hotshot
[]({{ “/uploads/2012/12/IMG_7422-e1356105097440.jpg” | prepend: site.baseurl }})The lad has been having a bit of fun with his Losi Micro Truggy, slowly he is getting used to the throttle not being a binary thing and is learning he can pull it gently and the car goes slower. I figured maybe we could have some out doors with my Hotshot. So off we went to a local park (Broken link ~~https://maps.google.co.uk/maps?q=Alexandra+Park+Road,+London&hl=en&ll=51.592749,-0.135119&spn=0.007665,0.01929&sll=51.528642,-0.101599&sspn=0.491254,1.234589&oq=alexan&t=h&hnear=Alexandra+Park+Rd,+London,+United+Kingdom&z=16~~), much fun was had for half an hour or so, putting a couple of batteries through it. Until I noticed it was looking a bit saggy at the front, I’m used to the front suspension being a bit pathetic but something was clearly a miss.
Upon inspection I noticed a couple of things, firstly the car was now 3 wheel driving, the front right drive shaft was missing and secondly, where the lower right suspension arm mounts onto the front gearbox was all very loose. I had noticed it take a couple of quite high speed knocks to the front, but this was a bit of a surprise. A bit of a closer look showed that the right half of the front gearbox had a nice big crack in it, as you can see from the picture over on the right! Click for a bigger one, this is the taken from underneath, you can see how big the crack is.
I am now wondering about the choice of that upgraded Sport GT (Broken link
http://www.tamiyausa.com/product/item.php?product-id=53779) motor I bunged into the chassis in a moment of weakness last year, maybe the stock 540 would have been enough for #1 son 🙂 I’ve now ordered up a pair of replacement front drive shafts and the ‘G’ Parts (Broken linkhttp://www.tamiyausa.com/product/item.php?product-id=9115191) sprue which contains both halves of the front and rear gearboxes, from Fusion Hobbies. Hopefully if it happens again it is the left side that takes a knock, not the right!
-
Diamond Demon build - part 5
Blimey, where did 6 weeks go!? After finishing off the lads boat, I’ve now tidied up a bit and started on the Demon again.
As you can see, I’ve got the UC bent up and mounted and the former glued into the fuselage. That is probably it for tonight while the Epoxy sets. Tomorrow I’ll crack on with building up the front of the fuselage and test mounting the motor.
